Come and make UV resin glitter pens with me! They are refillable too! (and learn about water slide paper)
Come and make UV resin glitter pens with me!
A year or so ago, I decided I was going to make resin cups. I bought a turner and all the supplies then went to work. It took forever. Like a week to create a cup and because I had to make everything outside I dealt with resin not curing in cold weather, dust, newspaper sticking to my cup due to wind and you name it!
Per my last blog you saw that I've been playing with UV resin. It cures in minutes and not days, UV rays from the sun will cure it so you don't want to do the entire process outside which helps so much.
Long story short, I love making glitter pens and have even gotten the water slides out. In this blog I will show you how to make glitter pens the right way AND how to use water slides.
Lets get started.
Products you need:
- Ink Joy gel pens-These are refillable and one barrel so you can glitter the entire pen. They are avail on Amazon, Target, Walmart and prob a few other places.
- Glitter-Any will do, fine glitter works best but chunky does work.
- UV resin-You can get this at any craft store but Amazon has some really good prices.
- UV light-The lower the wattage, the longer it takes to cure. I've heard you don't want to go over 24 watts as it will cute too fast. Or the good 'ol sun will work as well! I actually use an old nail lamp for gel nails.
- Sand paper
- Acrylic paint-I prefer this method over spray paint. I have a lot of colors so it makes more sense to me, plus your first coat can be cheap acrylic paint vs. expensive UV resin.
- Pliers to remove the clip off the pen (you can use your hand to twist off)
- Gloves to protect your hands
- A dowel or cabob stick to hold the pen for you.
- Disposable straw
- pool noodle or craft floral foam to stick the stick into holding your pen so that you are not laying it on its side.
- Box cutter or blade
- Water slide paper or cut vinyl-This part is not necessary, its just if you want to add a name or some kind of image to your pen. You can get this at your craft store or on Amazon. If you have an ink jet printer, make sure its an ink jet paper.
- you will need clear spray paint for water slides.
Your first steps are going to prep your pen.
Disassemble the pen:

Remove the clip off the outside of the pen. Simply twist/break it off. I use a set of pliers but you can twist it off with your hands.


Next disassemble the pen. Make sure you have a container for the pieces, they can get lost and then your pen will not work. Trust me, I am still looking for a pc to one of the pens I've made, I just know I will find it eventually. Unscrew the pen tip.

You have unscrewed the bottom tip and placed it into a container, then pull out the pen with spring, and the top of the pen that clicks to use the pen.


Next take a box cutter and shave that nub off left from twisting off the clip. Don't forget to face the blade away from you!
Get your barrels and sand them. A quick sanding will just allow the paint or resin to stick since the pen has a rubber barrel.
Next wash them off with water or alcohol and a paper towel to get the dust off.
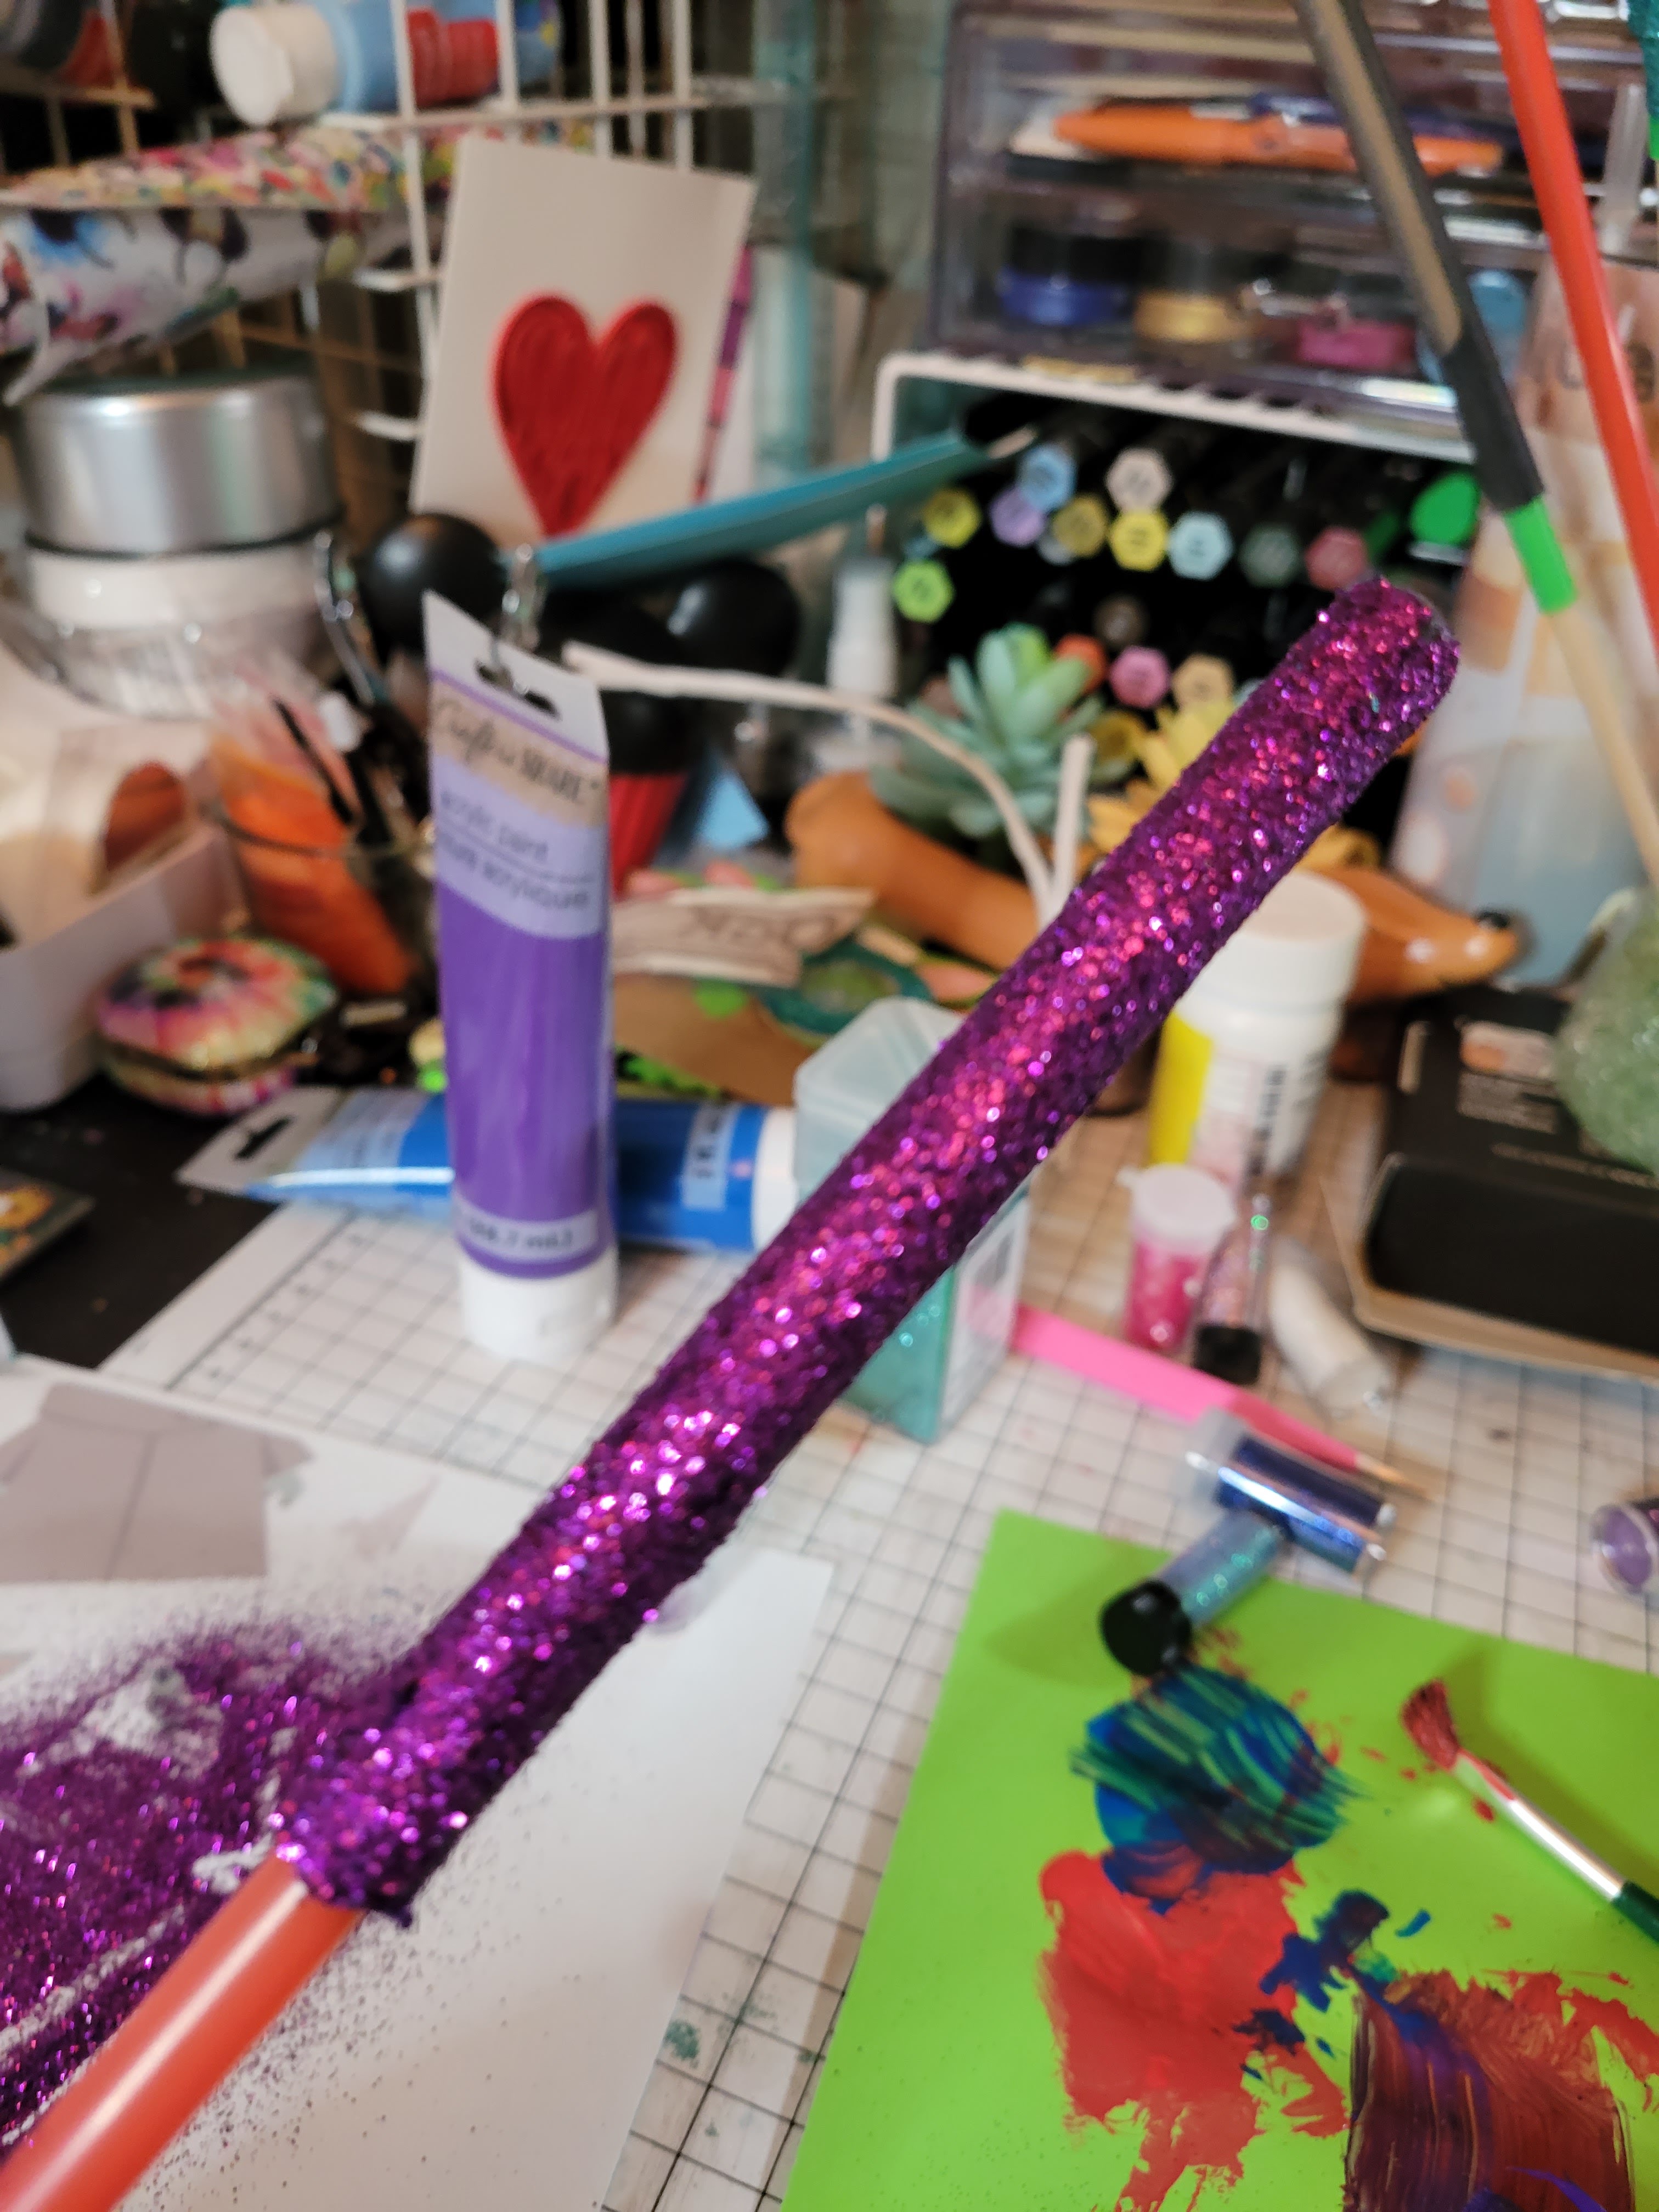
Now is the fun part, choose a color of acrylic paint that matches the glitter you want to use. This provides a base coat and colors the black pen so that you do not have black pen showing through your glitter. Paint a layer of paint onto the pen barrel, then pour glitter over it while its wet. The glitter sticks to the barrel. Let it dry. I usually will do a bunch of pens at the same time so that it has time to dry. I usually let it dry for at least an hour while I am painting/glittering more pens.

The next step is the first coat of UV resin.
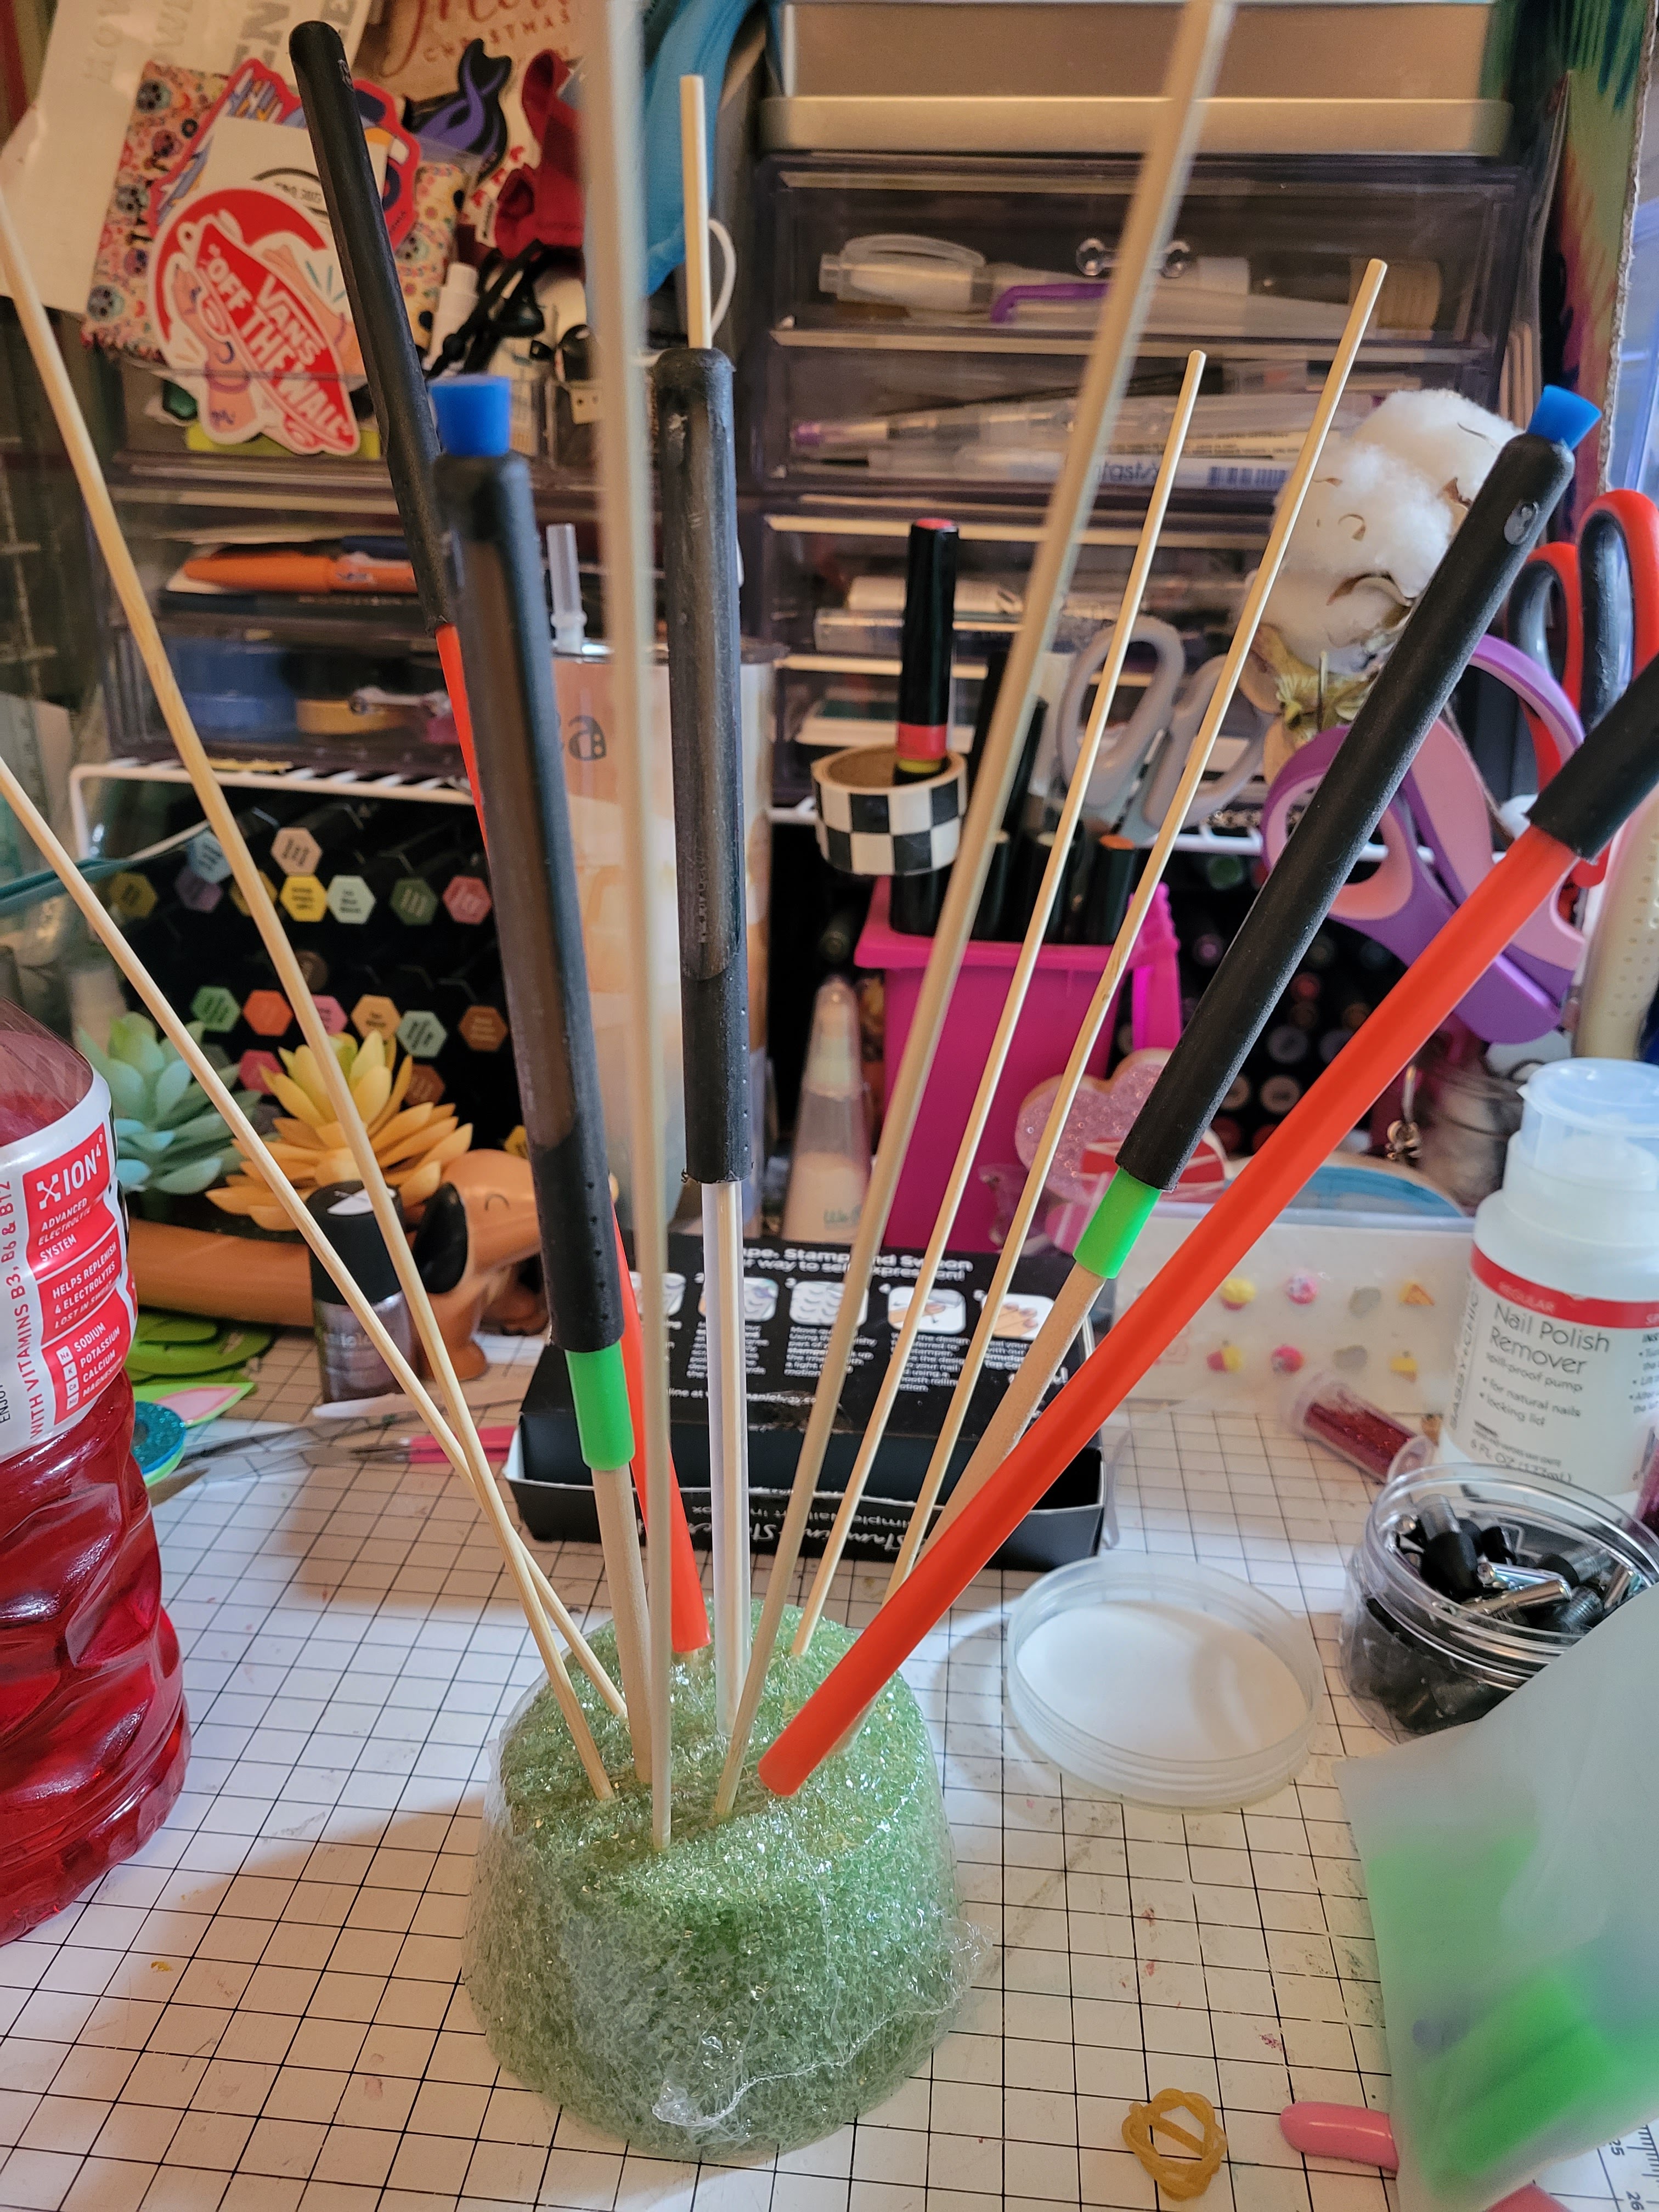
Slip a plastic straw into the barrel of the pen, find one that is snug, I save the ones from when we get fast food. You will hold the kabob stick so that you have a clean place to hold it. Get your noodle or your flower foam out because once you resin the pen and use your UV light you will want to stick the other end of the kabob stick into the foam to hold it up.
This is what my contraption looks like when I'm doing glitter pens. Flower foam, sticks with straws and pens.
Put your gloves on anytime you are working with resin, pour a small line of resin on to the barrel of the pen and rub it all over the pen. Try not to get any inside the pen. I usually go from one end of the pen to the other side smoothing it out. A little goes a long way. I often use about 3 strips of UV resin on 1 pen for the first coat. I just put it on till its smooth. Remember the more you use, the thicker your pen will be.
This pen has 1 coat of glitter and one coat of resin. It's smooth enough to add vinyl or waterslide now.

Once you are done, hold the kabob stick and use your UV lamp for 3 or 4 minutes. It should set, it may be slightly tacky If it is tacky, you can put it outside for like 5 min and it will be dry.
Next, another layer of resin if you pen is not smooth. If you feel glitter, you know you should use another layer of UV resin. Then under the lamp for about 7 min until dry, or take it outside.
The pen should be pretty smooth and you shouldn't really be able to feel the glitter. If you used chunky glitter, you may feel it. You can sand it then clean it with alcohol or you can just keep adding layers or resin and repeating the drying process till it is smooth. I have a few pens that I let be rough and they are fine.
Now, if you want, this is the time to add your water slides or even vinyl to the pen if you want to do so. If you do not want to add waterslides or vinyl to your pen, you can skip this step. Your pen has to be fully cured and not sticky to do the next step.
Water slide application:
Print an image on your water slide paper. I have ink jet water slide paper
Next, you will want to clear coat the paper 3 times outdoors, letting it dry in between sprays. This seals the water slide paper so that when it gets introduced to water, the ink doesn't just come off the paper.
Once you have done this, cut out the image you want to put onto your pen and throw it into some water for about 30 seconds (or look at the instructions on your specific waterslide paper).
Take the water slide out of the water, put the water slide image down on your pen and carefully slide it down so that the image sticks to your pen. If you wait till your water slide is even more wet, you can slide it off onto your finger and place it on to your pen.
This process took me 6 sheets of paper to get right but I had never worked with this before. You can add a tiny bit of water to your resin pen to help slide the water slide around and it will help you place it where you want it.
You will need to wait for your pens to dry. You can also a paper towel and carefully dry off your pen. I do a few pens at a time so by the time I am done with other water slides, my pen is dry.
The little paws are done with clear water slide.

If you have a Cameo or Cricut machine you can cut your vinyl and simply stick it to the barrel of the pen and move to the next step. I really love the way it turns out.
This was done with vinyl. You can use 651 (permanent vinyl) or 631 (non-permanent vinyl) You are sealing your pen barrel with another coat of resin so it will stay.
Last coat of UV resin. This is to cover the beautiful waterslide work or the vinyl you added so that it stays on your pen forever.
Coat it, UV lamp it, sometimes its still sticky so I set it in the sun till its not tacky. If you can still feel your water slide or your vinyl, do another coat of UV resin. Sometimes I have to coat it multiple times.
You are done and have a gorgeous glitter pen!
Now for those of you that love making glitter pens there is a cool tool out there that I got on Amazon, they are called Non-Stick silicone sleeves and plugs for resin pens. I bought a pack with dowels, sleeves, and plugs so that I could use those instead of sticks/straws. They seem to work nicely and the silicone can be put under a lamp so any of the resin that gets on it will come right off once cured. They are reusable and you simply put the sleeve inside the pen, over the dowel and the plug on top of the pen. I stick the dowel into the flower foam and I can remove it and place it back in anytime I want. This also helps if you are doing multiple pens at a time. The plug/sleeve prevents resin from going inside the pen. They are made of silicone so the resin does not stick to them. Once you get the hang of it, you will want to make several at a time.
Dowels, sleeve (green), plug (blue)


I love making these for gifts and for myself! I even made a couple for my husband as he is a teacher.
As you make them, you can try different styles like 2 toned or even glitter designs. I am new, so I'll stick to one color at a time!
Another fun idea is making boxes for them if you have a Cricut or Silhouette machine. I made these cute little giftable boxes!

This is definitely one of my new favorite gifts. Also, people sell these things for 10.00. So, if you would rather buy one, let me know what you would like and I can make one for you.
Thanks for reading and I hope you learned something today!
💓ImGinBugCrafter
Please leave a comment and visit my Instagram! Follow me! I try to post once a month unless I find a new craft that I'm super excited about.
I found one successful example of this truth through this blog. I am going to use such information now.
ReplyDeletepain clinic toronto