Hello and welcome to 2022! My blog is officially 1 year old! I am so excited to still be interested in blogging my craft ideas and my new craft adventures.
Today we are talking about sublimating tumblers. I have sublimated many things at this point including coffee mugs, keychains, washcloths, pillowcases, car coasters, coozies, mousepads, puzzles among other things.
I heard you could use a convection oven to sublimate tumblers and I really got excited and got to work!
Supplies you need:
- Sublimation printer
- I use the Epson Eco-Tank ET-2720 loaded with special sublimation ink (previous blog)
- Found mine at Best Buy for around 200
- Sublimation paper
- I use Asub sublimation paper a 20 ounce tumbler would require at minimum 8.5x11
- Amazon
- A computer system that allows you to modify images.
- I have Silhouette Studio I use with my Cameo (the software is free)
- Cricut design space will not allow you to print the size of image you need
- Canva is a good one too
- Heat tape
- Clear high temp heat tape
- Amazon
- Shrink wrap film (5x10)
- This is a shrink wrap made for tumblers
- Amazon
- Low temp heat gun
- I have a drillmaster heat gun I stole from my husbands garage.
- I initially tried my tried and true embossing heat gun and it works but I did melt a few of these, so I'd get a low temp heat gun if you can.
- Check your husband's garage!
- 20 ounce sublimation coated skinny tumbler
- These must be coated to use for sublimation and you could do this with really any cup that can be covered with a shrink wrap.
- I wouldn't use anything with plastic on it
- amazon
- A convection oven large enough to fit a tumbler
- I have an Oster 6260-000 6 slice convection toaster oven
- Larger is better due to the flow of air and hot spots that can be in the oven
- Do not use this oven for food after you have sublimated in it
- Found at Goodwill for 12.49
- Temperature gauge
- The temp that your oven knob states is not always accurate. In fact, my oven gauge that was set at 300 was measuring 375 with my laser temp gauge.
- Any in-oven temp gauge or laser gauge will do, I actually use a laser temp gauge that is used to check the temp of a lizard habitat.
- I have to open the door to my convection oven to check the temperature because it is a laser and not an in-oven gauge.
- A silicone mat to cover your wire rack in the oven
- There are other things you can buy and some people used paper, I just am afraid of burning the paper.
- Heat resistant gloves to touch your tumblers, they will be hot!
Now that you have your supplies, lets take you through the process of sublimating at 20 ounce straight tumbler.
First, I design an image in Silhouette Studio. Now with that said you can use any program, its just a print job. If you have a design in word and it can be the proper size, print it out on your Sub printer and use it.
For this, my image must be 9.3 inches wide x 8.2 inches high. I turn the image so that I can print it out on my 8.5x11 sheet of sub paper. You have to mirror your print job. I have my printer set to mirror because its a sub printer so I won't be printing anything else on it and you always want to mirror the image.
Below is an image I created for a friend to give to her cheer coach.
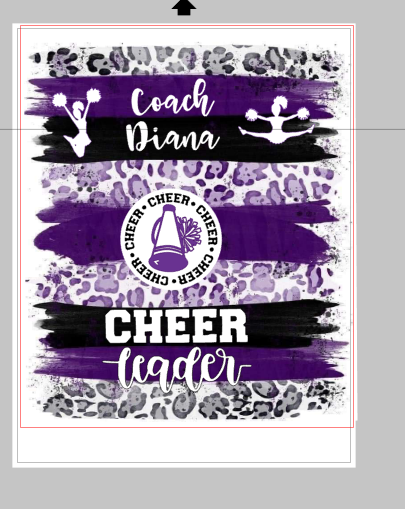
It is important to get the image perfectly aligned with the top and bottom of your cup. If you have too much paper on top and tape it down, you will get ghosting. Ghosting is when your image does not properly die the substrate and you have a white blobby mark instead of your pretty design.
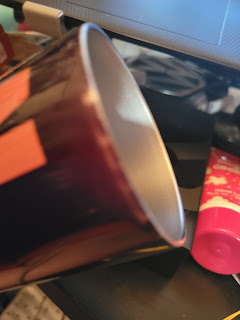
Below shows some ghosting at the lip of the cup. Sometimes it just happens but the way I am showing you, you shouldn't get any ghosting on your cup.
Next, I need to trim the white sides off so that it fits my cup perfectly. Then I tape the image to the cup.
Below are a few things to consider when taping the image to the cup;
- Tape paper to paper, if you put tape on your cup, the sub won't sub in that spot and your will have a white spot
- Squeeze the paper as tight as you can when you tape
- I use 3 strips horizontal on the seam, and one or more strips to cover the seam vertically.
- I don't tape the top or bottom, I have found that makes it ghost as it bends the paper and causes air pockets.
- Take any stickers off of the cup as they will burn. Most cups do have a silver sticker on the bottom, remove that before you shrink wrap them.
This is what a taped cup looks like:

Next you want to use your shrink wrap film to seal the tumbler. This will provide the pressure your image needs to sub the cup.
- Slip the sleeve around your cup leaving room at both ends.
- Under low heat in sweeping motions shrink that plastic and make sure there are no holes, bubbles, or wrinkles. You can keep going over the area to get these out. I have had small wrinkles in the plastic, and it was fine.
This is what your cup should look like when its shrink wrapped.
If you have some holes in the plastic, it still works. I've done it.


Above you see where I accidentally melted the plastic, it still subbed well, but I was a little worried.

Now your cups are ready for the oven.
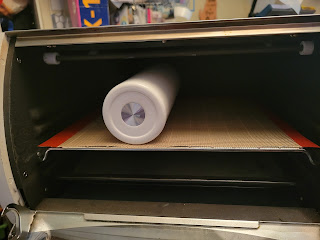
This is how I have my convection oven set up. I have cut a silicone mat the size of my . I don't want my cup to hit any metal if I can help it. If your cup hits metal and burns the shrink wrap you could have some ghosting but mine have been okay.

I left the crumb tray inside and 1 rack in the middle of the oven. Cut down and put the silicone mat on the rack.
Next turn your oven on bake at 350 and check the temp to ensure it stays around 350 to 375 degrees.
Its important to check the temp throughout the process, it can burn.
Put your glove on and sit your cup inside your oven. Some people have success turning their ovens on their side and standing up their cups. I just have not tried that.
This is my cup placement; I have done 2 at a time.
I keep checking the temp and I rotate the cups and roll them around in there every 2 minutes for 5 minutes. Some people online say every 3 min or some people say 6 min total. I do this and it works so I'll continue to use this process until it doesn't work anymore.
Keep your gloves on and take the cup out. You can let it sit until its cool to remove the plastic and sub paper or you don't have to. It is easier to get the plastic off if you remove it when its hot.
Now you have a beautiful, personalized tumbler.
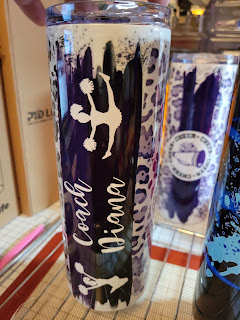
I have made a few so far, pictures are below (some images were bought off etsy, some I created.)


Tumblers are so fun and they turn out so great!
Thanks for reading my blog, let me know what kind of tumblers you like. If you make them, do you have any tips?
💓 www.ImGinBugCrafter.com
Comments
Post a Comment